
Craft Notes: Walk on the Wild Side
- Brenda

- Dec 1, 2025
- 2 min read
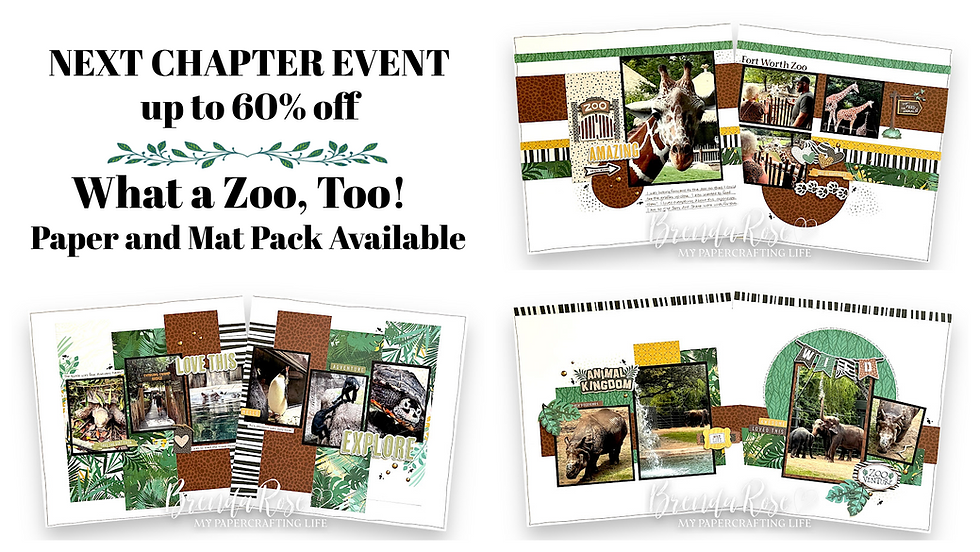
The What a Zoo, Too! paper pack ($5.00) and mat pack ($4.00) are part of the Next Chapter Event—WOW! What an incredible value! This collection is absolutely amazing, and with just these two items you can create such beautiful, vibrant pages. Whether you’re scrapping zoo adventures, wildlife encounters, or any outdoor photos, these papers truly shine.
Story Behind the Page
This past workshop was all about embracing the wild, whimsical energy of our visit to the Fort Worth Zoo. I loved getting these photos—giraffes stretching their long necks, penguins waddling about, rhinos cooling off, elephants gathering as families. There’s something so joyful about documenting moments like these, and the What a Zoo, Too! collection brings out the color, texture, and personality of each animal beautifully.
As I worked through the layouts, it was fun to watch how the papers transformed depending on the photos. Some pages turned bold and graphic, others warm and earthy, and others playful and bright. That versatility is exactly why I adore this pack!
Design Notes
The What a Zoo, Too! papers are richly textured—think giraffe spots, leafy greens, bold stripes, and animal-inspired prints. By layering these with the mats, you naturally get eye-catching contrast without overwhelming your photos.
Here are a few design choices that really pulled the pages together:
Centered clusters: Keeping the clusters close to the photos helped make the animals the true focal point.
Repeating patterns: Using the same animal print on both sides of a layout creates balance and helps the spread flow.
Simple backgrounds: Pairing busy papers with crisp white or lightly patterned backgrounds gives the eye a place to rest.
Color echoes: Pulling colors from the photos—greens, browns, and neutrals—helped each page feel unified and intentional.
Every layout in this workshop shows how easy it is to mix large prints with smaller patterns when the colors coordinate so perfectly.
Tips & Techniques
Here are the techniques I focused on during the workshop:
Horizontal Strips for Flow
Cutting papers into horizontal bands creates instant direction across your page—perfect for telling a story from left to right.
Mat Stacking for Depth
Layering two or three mats together (even slightly offset) builds dimension and draws attention to key photos.
Circle Elements
Adding circles—either punched or cut with your Custom Cutting System—softens the straight edges and brings movement to your layout.
Title Blocks
Using mats as title bases helps the words pop and gives your layout a strong anchor point.
Repeating Small Embellishments
Sprinkling a few dots, arrows, leaves, or small shapes throughout the spread ties everything together without cluttering the page.
Mix Bold & Neutral
If you’re using a bold animal print, pair it with a softer green or solid to keep the page cohesive—not chaotic.
If you loved these pages (and I hope you did!), now is the perfect time to grab the paper pack and mat pack during the Next Chapter Event. Grab the PDF below for these pages. For just $9 total, you can recreate every layout from this workshop and so many more.


Comments